Table of Contents
Follow Me #
- Customize redirects to multiple external phone numbers in turn.
- At PBX Settings tab select Follow Me, click Edit extension.
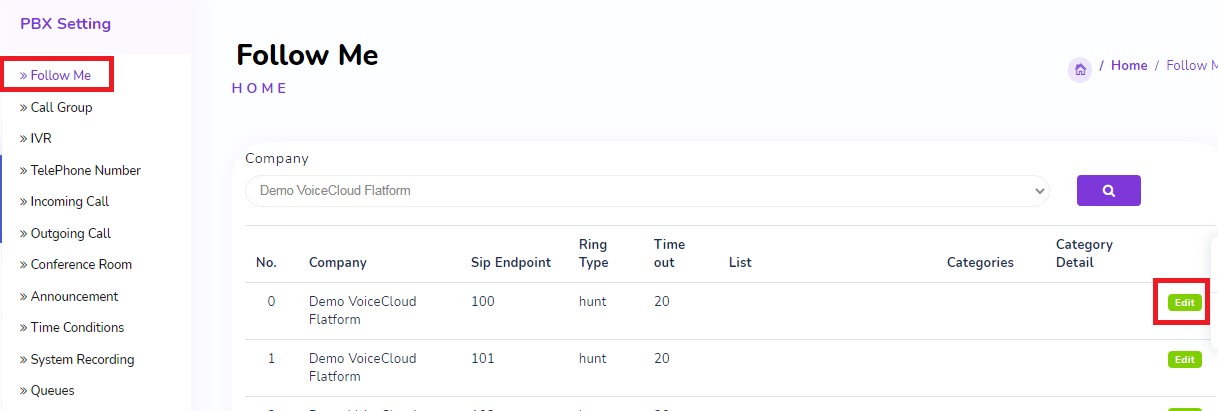
Enter the numbers in Follow Me List field
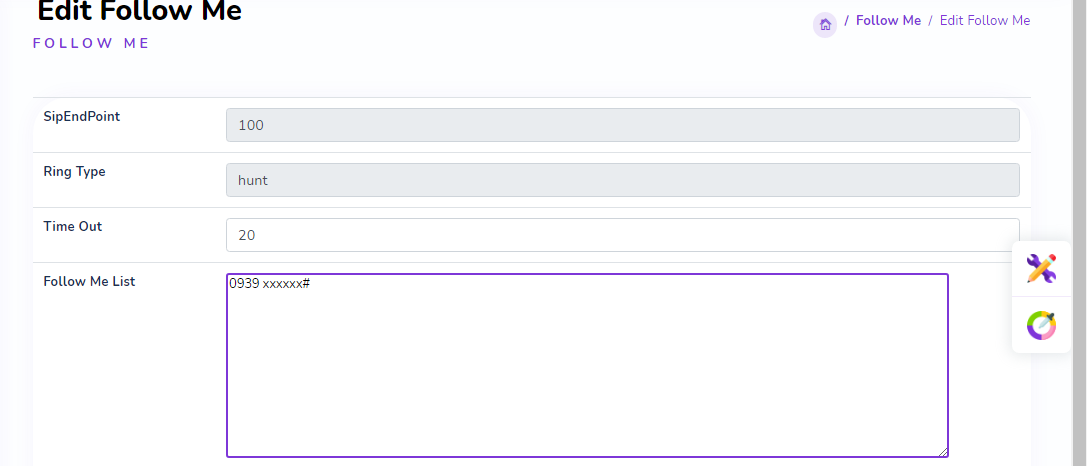
In the format: phone number # phone number (eg: 0903xxxxxx# 0984xxxxxx# )
Select OK to create
Call Group #
- Create live groups for extensions.
- At PBX Settings tab select Call Group.
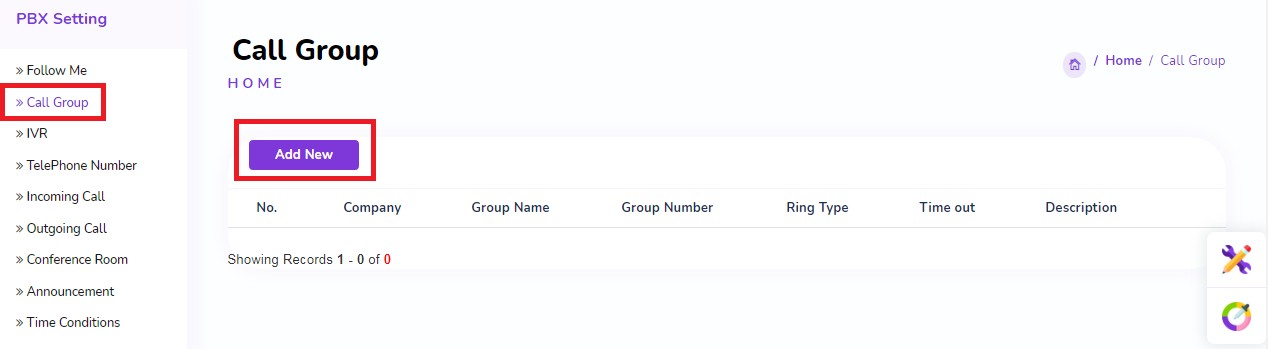
- Select Add New to create new or select Edit icon( ) to edit existing Call Groups
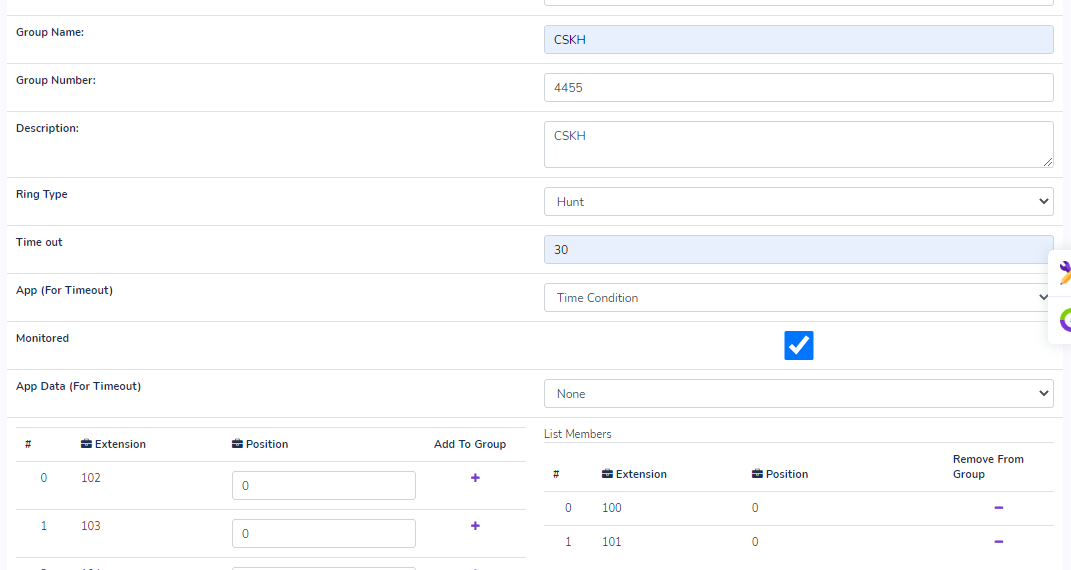
Some important informations:
- Group Name – Name of the group.
- Group Number – 3 or 4 digits, must not coincide with Ext numbers.
- Description – Description/Note of the group.
- Ring Type – Ring type when there is an incoming call.
- All – All active devices within the group will ring at the same time .
- Hunt – All active devices within the group will ring in an order.
- Time out – Ring time for each Ext in the group.
- Monitored – Voice recording for this Ext group.
- List Extensions – List of existing Extentions.
- Select Add Ext at the respective Exts to add that Ext to the Group/Department.
- List Members – The list of Exts that will be members of the Group/Department.
- Select Remove Ext at the respective Ext to take that Ext out of the Group/Department.
- App (For Timeout) – Specifies the system’s next action when the group’s maximum time is up.
- App Data (For Timeout) – Select specific details of the selected action.
- Select OK.
Create IVR #
- Create/customize automatic interaction in incoming call distribution.
- At PBX Settings tab select IVR
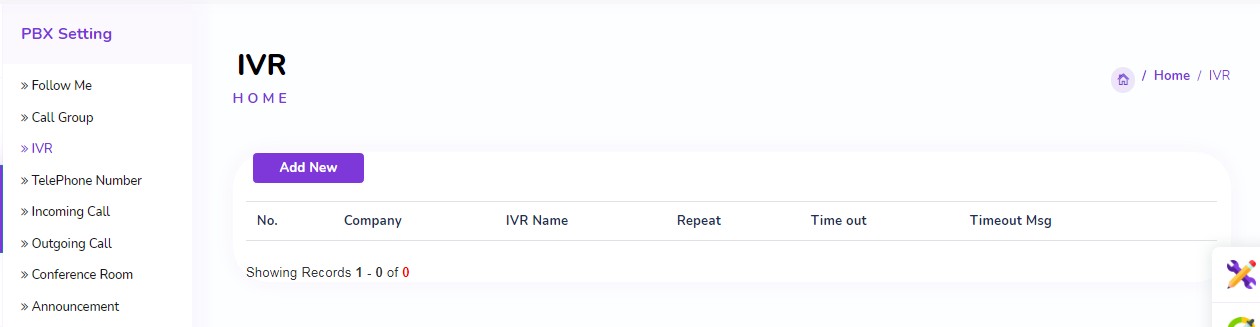
- Select Add New to create a new system greeting line or click Edit Icon ( ) to edit an existing line.
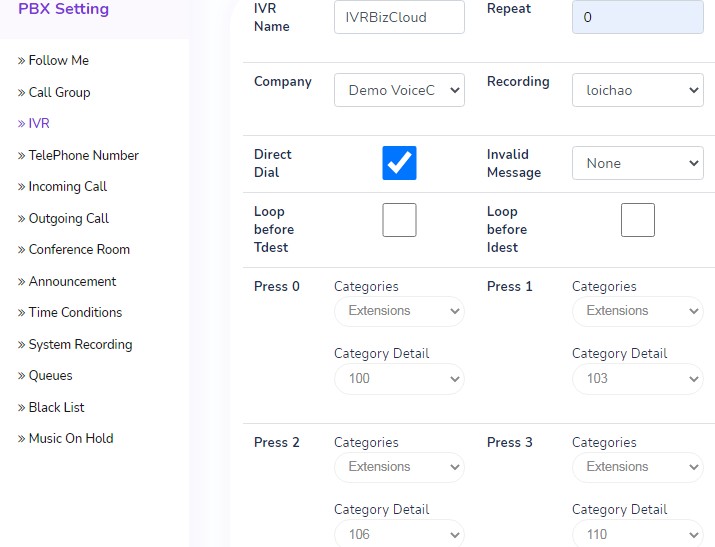
Some information of note:
- Name – Name of the greeting line
- Repeat – Number of times the line is repeated.
- Direct dial – Allow dialing an internal number while listening to the greeting.
- Recording – Voice file for the greeting (Refer to Upload greeting file section).
- Press 0 to 9 – Optional interactive keys for call dispatch.
- Timeout – Action when the greeting line has finished playing.
- Invalid – Action when the caller pressed a button not configured in the greeting line
Select OK.
Edit incoming calls direction #
At PBX Settings tab select Incoming Call
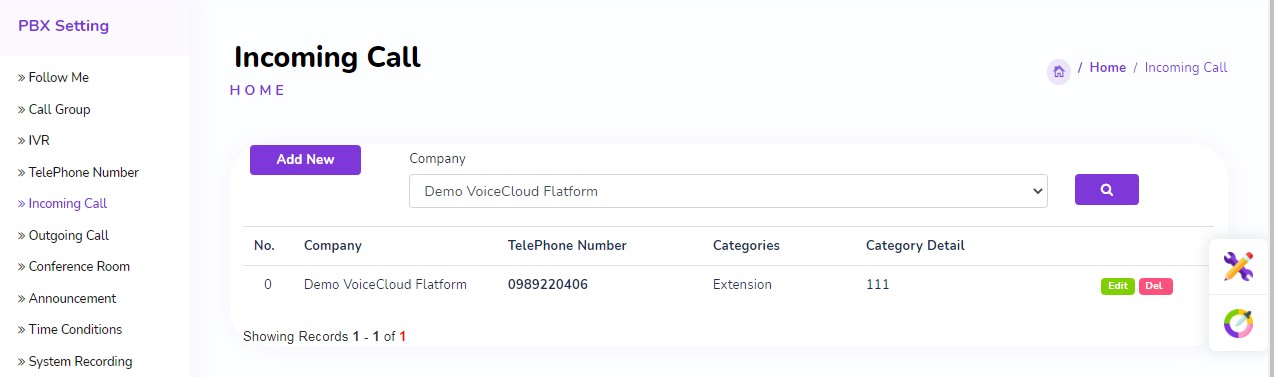
Click Edit Icon ( ) to edit the input of the corresponding extension
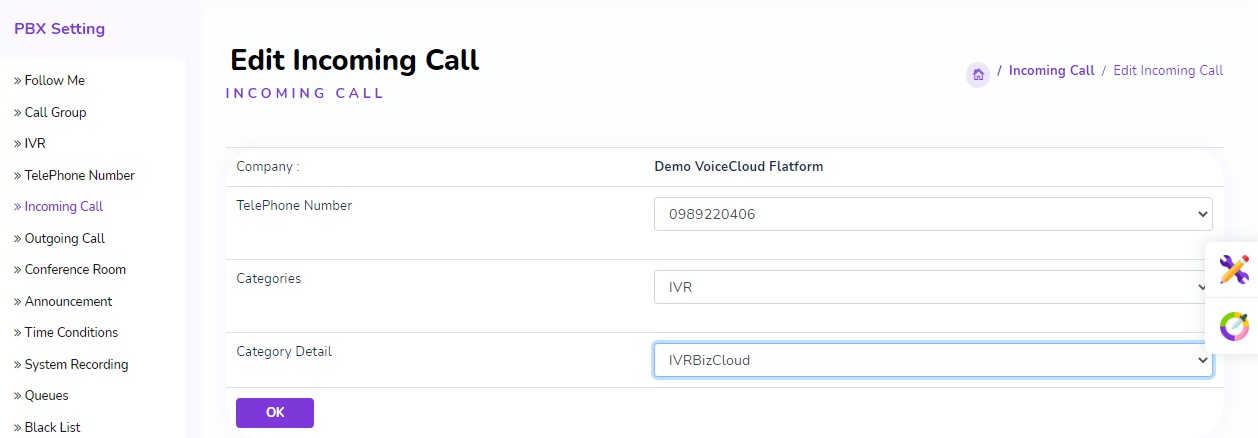
Some Categories for incoming calls:
- Time conditions – Direct incoming calls based on time.
- Groups – Ring in-turn/ all-at-once on internal devices.
- Extension – Ring directly on an internal device.
- Conferrence – Direct call to the Conference Room.
- Queues – Direct calls to the queue.
- IVR – Direct calls to the greeting line.
- Annoucement – Direct calls to the announcement.
Select OK
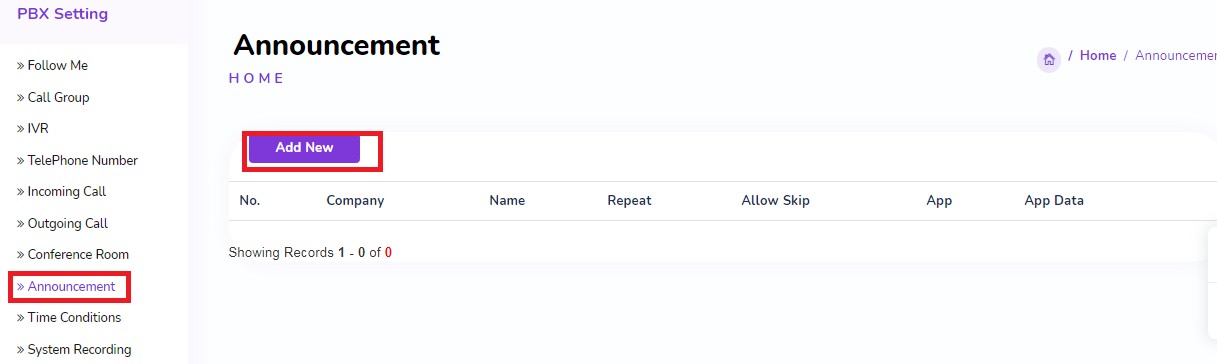
Create Announcement #
- Create/Customize the company greeting script without keypress interaction.
- At PBX Settings tab select Announcement and click Add New.
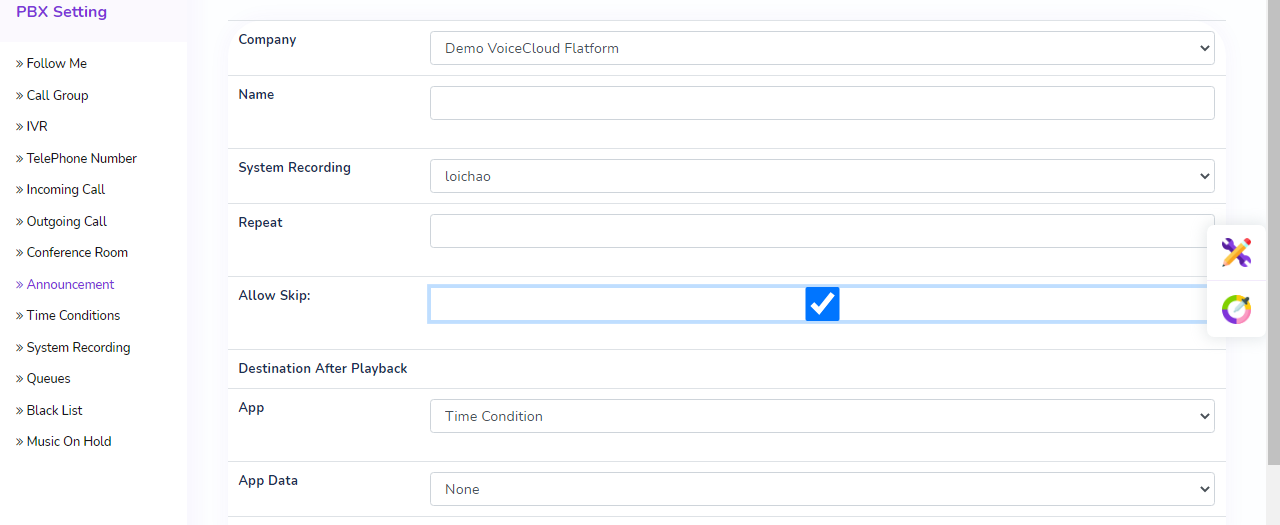
- Enter the followin information:
- Name – Greeting name
- System Recording – Select greeting voice file
- Repeat – Number of times the file is repeated
- Allow Skip – Allow interrupting greetings, pressing any key will go straight to the direction specified below
- Destionation after PlayBack – call direction after playing the greeting line
- App – Specifies the operation that the system will do
- App Data – Select detailed items in the operation
Greeting file upload #
At PBX Settings tab select System Recording
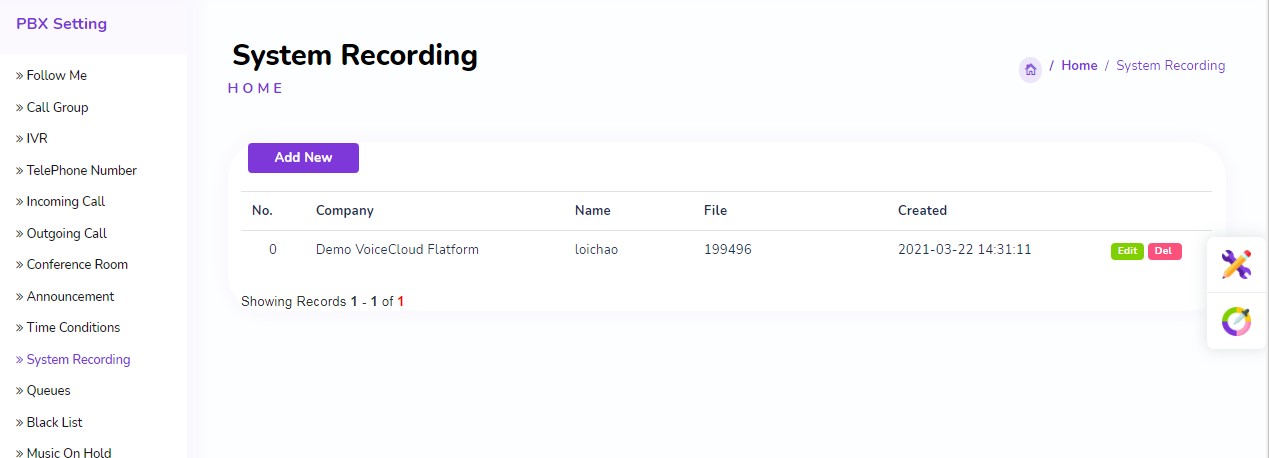
Select Add New to Upload File to the system
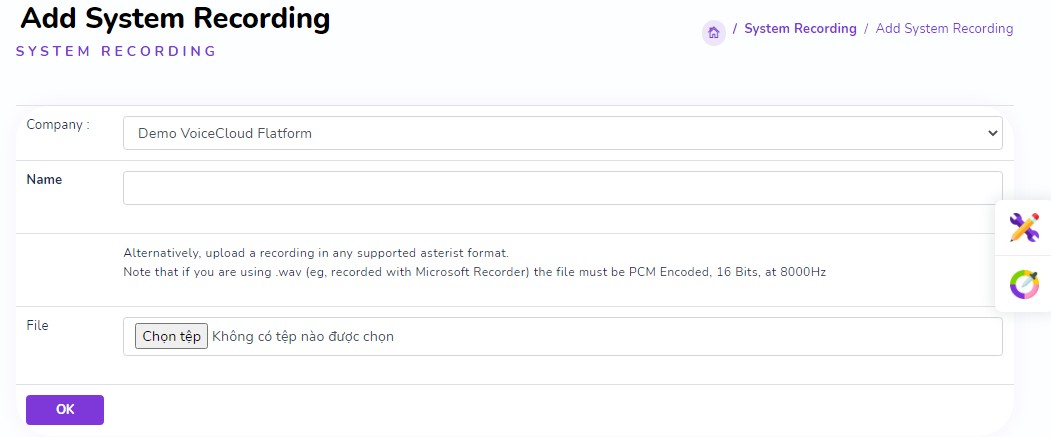
- Name and select “Chọn Tệp” to upload the file to the system. Note: The recording file must follow these requirements (file .wav, mono, PCM Encoded, 16 Bits, at 8000Hz.)
- Select OK.
Select Time Condition #
- Create and customize a specific timeframe for call directing purposes.
- At PBX Settings tab select Time Conditions
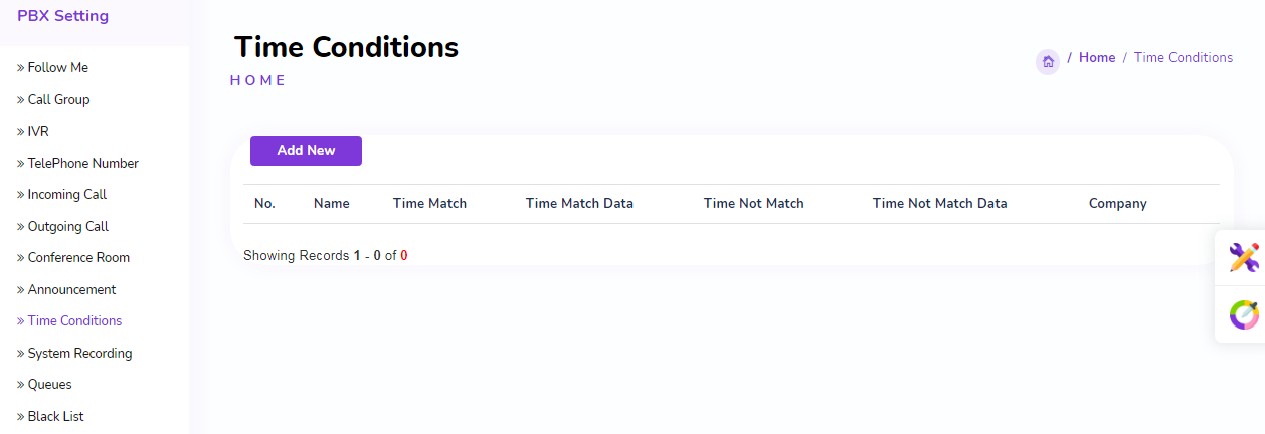
Select Add New to create or click Edit icon ( ) to edit existing Time Conditions
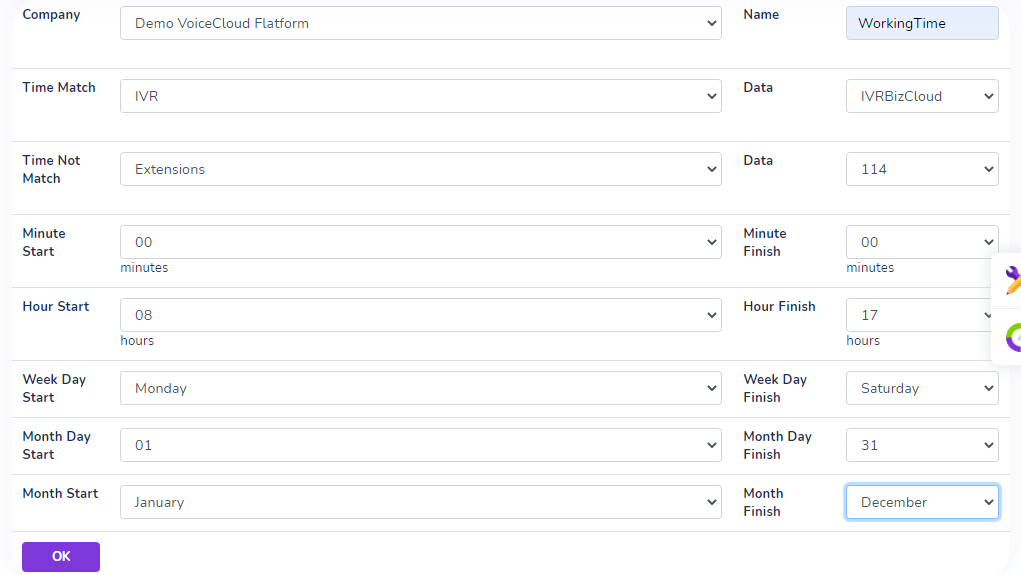
Some information of note:
- Minute Start/ Finish – Start/end minute of timeframe.
- Hour Start/ Finish – Start/end hour of timeframe.
- Weekday Start/ Finish – Start/end weekday of timeframe.
- Month Day Start/ Finish – Start/end monthday of timeframe.
- Month Start/ Finish – Start/end month of timeframe.
- Time Match – Time fits in the selected settings above.
- Time Not Match – Time does not fit in the selected settings above.
The example in the image shows:
- Time period: 08:00 to 17:00 from Monday to Sunday (January 1 to December 31)
- During this time: incoming calls will be pointed at the IVR Song Thanh greeting
- Outside of this time: the call will be pointed to a busy message named Ngoai gio.
Select OK.
Create Queue #
- At PBX Settings tab select Queues

Select Add New to create or click Edit Icon ( ) to edit existing Queues
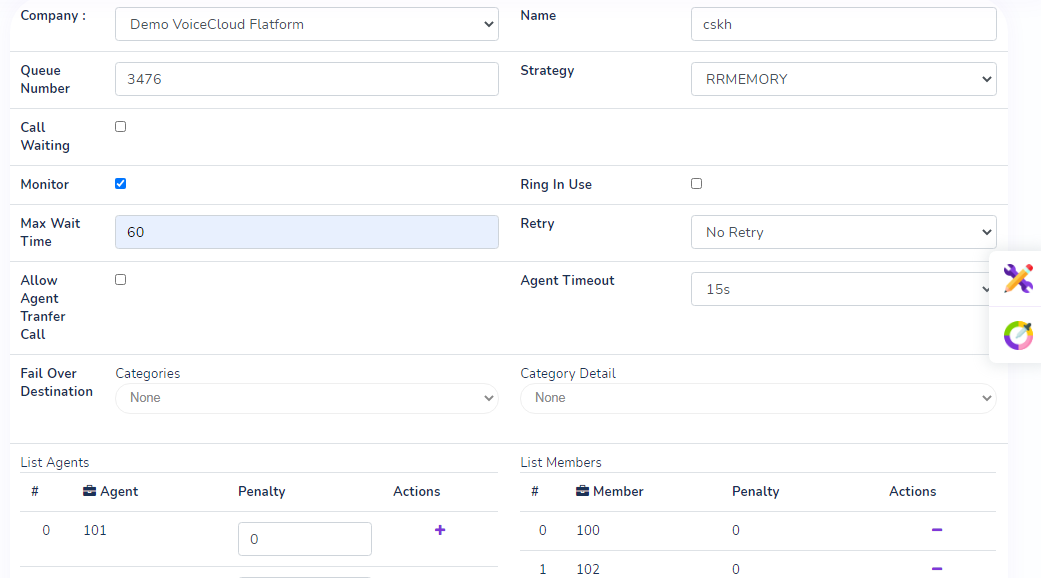
Custom parameters in Queues:
- Name : Queue name
- Queue Number – 3 or 4 digits, must not coincide with Ext number
- Ring Type – customize ring type for incoming calls
- ALL – ring on all devices at the same time
- RRMEMORY – Ring the call time evenly on all devices
- RANDOM – Ring on random devices
- Monitored – Voice recording for this extension group
- Max Wait Time – Ring time of the Queue
- Retry – Agent break time after receiving the call
- Agent Timeout – Ring time for an agent
- List Extensions – List of existing Ext
- Select Add Ext at relevant Ext to add to the queue
- List Members – List of Ext that will be members of the Group/ Department.
- Select Remove Ext at relevant Ext to remove from queue
- App (For Timeout) – Specifies the system’s next action when the group’s maximum time is up
- App Data (For Timeout) – Select detailed value of selected operation
Select OK
BlackList #
- Block phone numbers calling in.
- At PBX Settings tab select BlackList then click Add New.
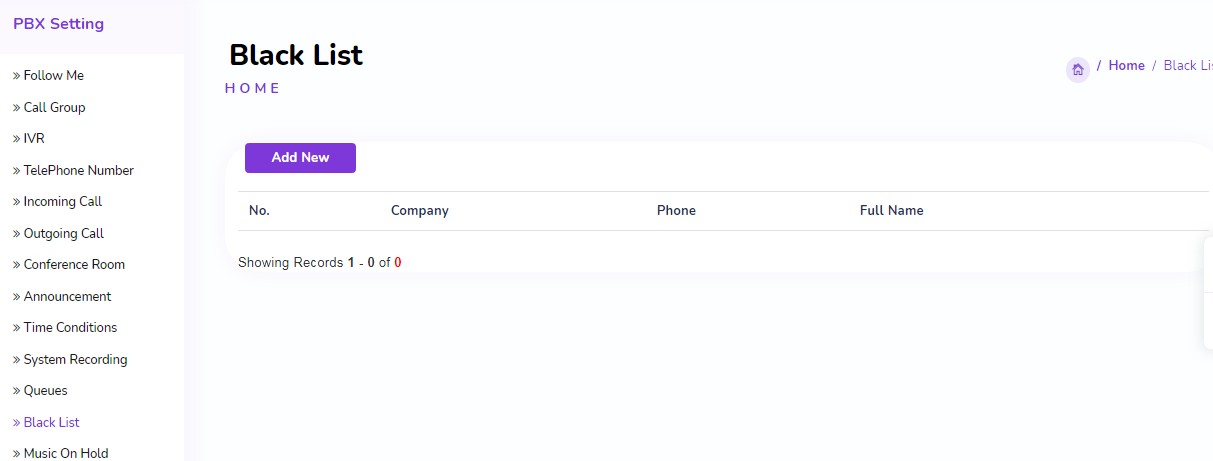
- Enter the following:
- Phone : phone number to block ( Mandatory )
- FullName : name or reason to block ( Mandatory )


